From our last post, we connected 4 hard drives with SATA to USB controllers to our Raspberry Pi with an LCD and were able to assemble our RAID5 array. Now we’ll be looking into putting it together into the Netgear ReadyNAS enclosure, powering on/off with a relay, temperature monitoring, backup/activity LEDs, and so on.
(sneak peak of the NAS4Pi built)
Relay for power switch, RPi power off and temperature monitoring of mosfets
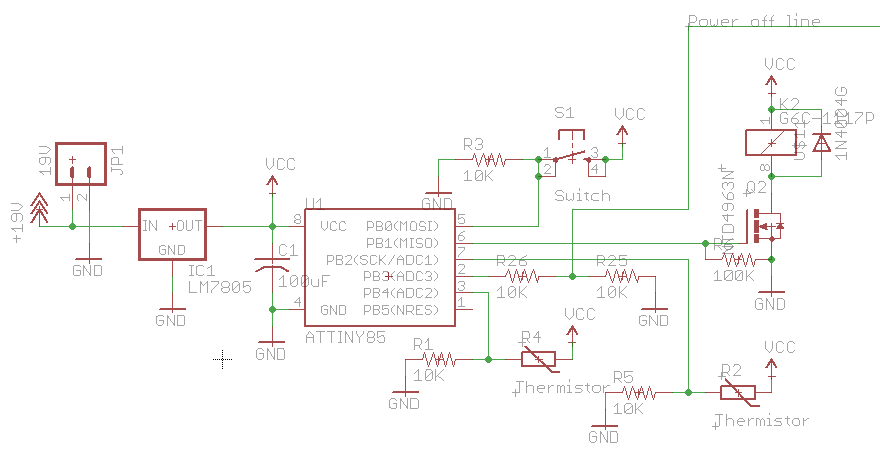
To be able to switch on and off the NAS4Pi, I’ve hooked up a relay which is using ATtiny25 that switches on the SMPS. The only issue is that we need to give the relay 5V at 80mA, so I’ve just put on a LM7805 with a heatsink to power the ATtiny and relay and it’s temperature hovers around 50C or so. One thing I didn’t notice with relays initially was that you should have a diode connected up to the coil because otherwise when you switch off the relay you’ll have some backEMF.
When we’d like to switch off the RPi, we shouldn’t just switch the power off at any time instead we’ll use a power off line which when it goes high will tell the RPi to shutdown and we will wait about half a minute for it to shutdown before switching the relay off.
For temperature monitors of our mosfets we connect two thermistors to our ATtiny, one for each mosfet and if they reach 70C then the relay will be switched off. Previously I found that one of my smaller inductors in the SMPS reached 84C, I tried a similar sized inductor with a larger coil but it didn’t seem to help, eventually going to a inductor with more windings was the solution as it dropped down to 54C.
Download ATtiny25_Power_Temp_Mon_NAS4Pi_v1.0, NAS4Pi_Monitor_Power_Button and Full schematic
.
Backup button and LED, Drive LEDs, Activity LED and update Boot script
For the backup LED and activity LED they are powered directly from the RPi as an output, the backup button goes into the RPi too. All scripts are set up to start when the system boots.
lcd.message("Backing up...")
GPIO.output(BACKUPLED,GPIO.HIGH)
subprocess.call("rsync -av /mnt/raid5share /media/raid", shell=True)

GPIO.output(BACKUPLED,GPIO.LOW)
print "Backup ok"
lcd.clear()
lcd.message("Backup ok")
time.sleep(3)
When the backup button is pressed, we can simply call rsync to do the backup, this works assuming you have the other device “raid5share” already mounted which you can have the RPi do it at start up. Download NAS4Pi_Monitor_Backup_Button
readactivitycheck = subprocess.check_output("iostat | grep md0 | awk 'NR==1 {print $5}'", shell=True)
readactivitybefore = int(readactivitycheck)
time.sleep(1)

readactivitycheck = subprocess.check_output("iostat | grep md0 | awk 'NR==1 {print $5}'", shell=True)
readactivityafter = int(readactivitycheck)

readactivity = readactivityafter - readactivitybefore
print "Read MB/s:",readactivity

if (readactivity > 0):
	GPIO.output(LEDLINE,GPIO.HIGH)
	else:
	GPIO.output(LEDLINE,GPIO.LOW)

time.sleep(1)
For the activity LED, we can use iostat to read the read/write activity then wait 1 second and re-read it, if there is any change then we know some activity occured so turn on the LED and re-check again in 1 second.
With the drive LEDs, I’m just using a 74HC595 and they light up if the drive is found to have no reallocated sectors, current pending sectors or offline uncorrectable errors which are constantly check for every minute. Download NAS4Pi_Monitor_Activity
The bootup script has remained relatively the same except for adding the shift register code and checking the SMART of the hard drives. Download NAS4Pi_Bootup
.
Putting it all together
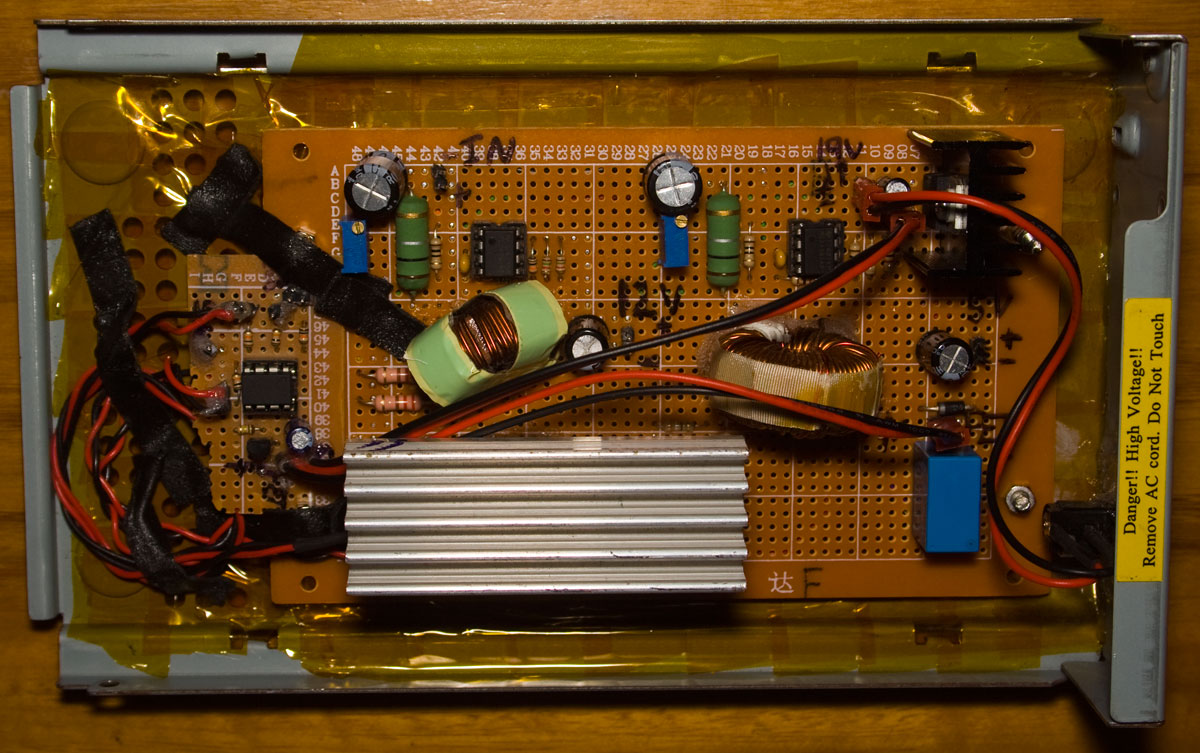
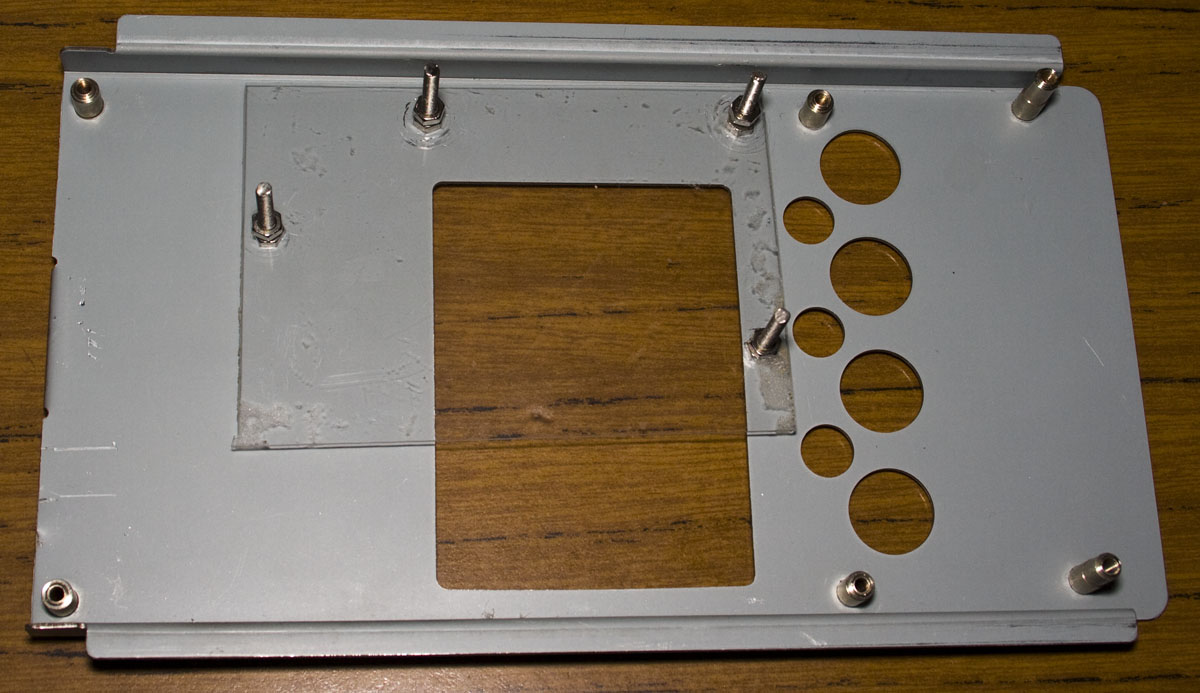
Firstly I drill some holes on the bottom where the power supply used to sit, layered it with some kapton tape and placed the SMPS and ATtiny25 board on it. I cut a small acrylic piece for the power jack, super glued and backed with some regular glue too the power jack to the acrylic and then the acrylic to the metal hole – it looks pretty bad but it works.
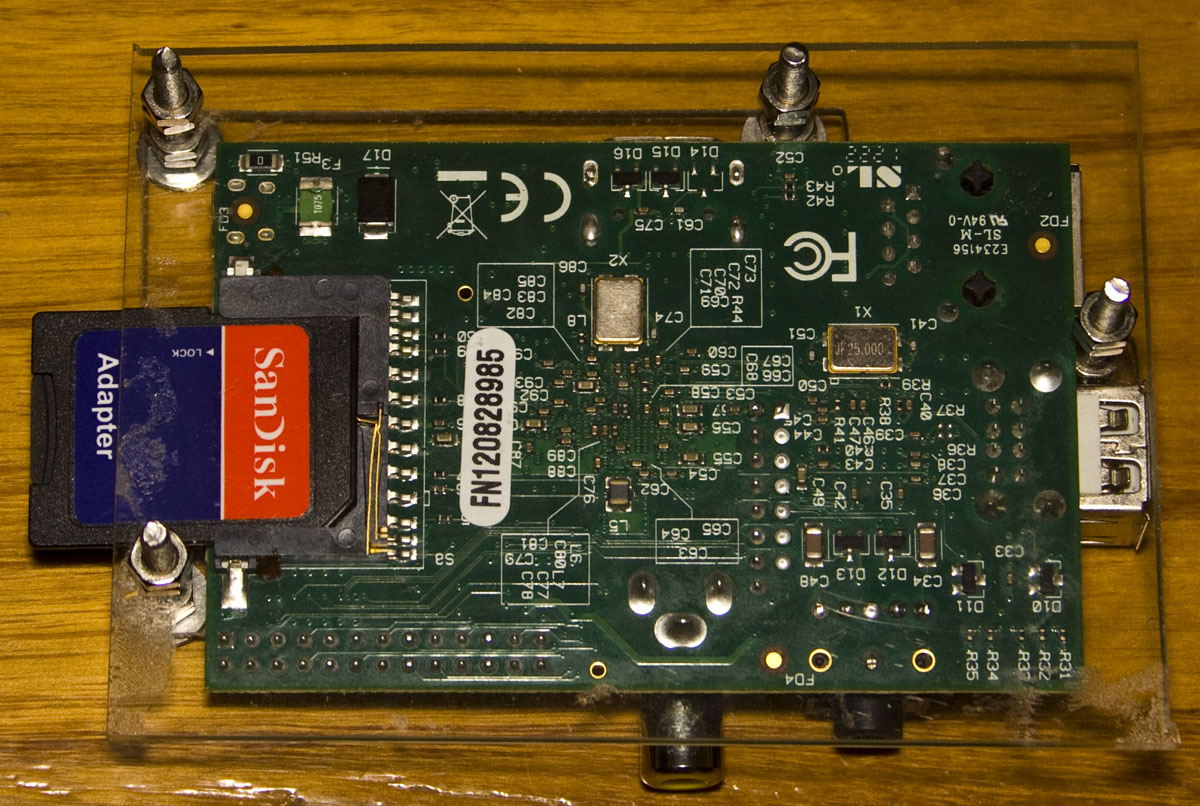
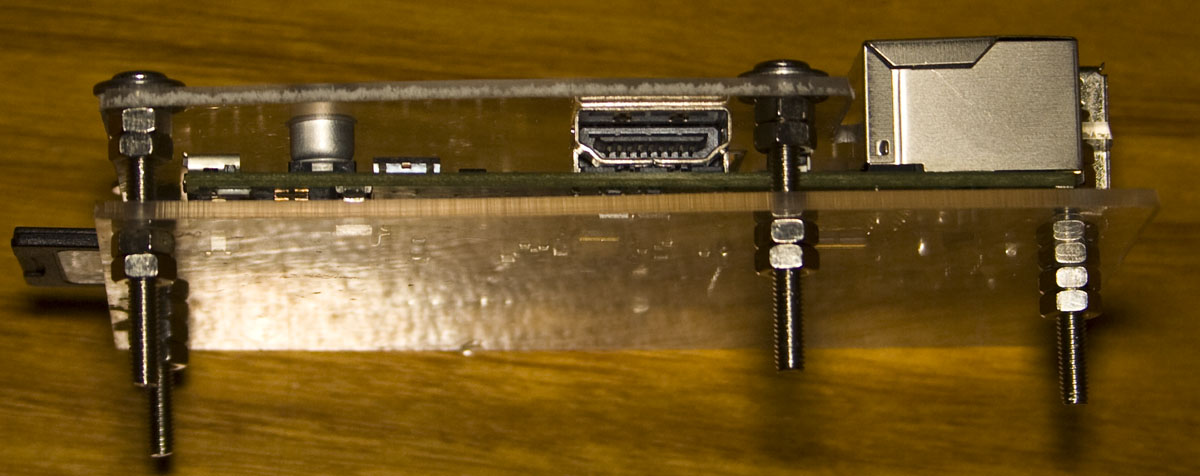
Next I made myself a custom acrylic piece to hold the RPi in place as it’ll be mounted upside down in the NAS. The acrylic piece sits on the HDMI port, there’s a small hole for the capacitor to the right of it and then the slight pressure of both sides hold it in place. There was going to be another screw for the bottom right of the RPi near the audio port but that acrylic piece snapped off.
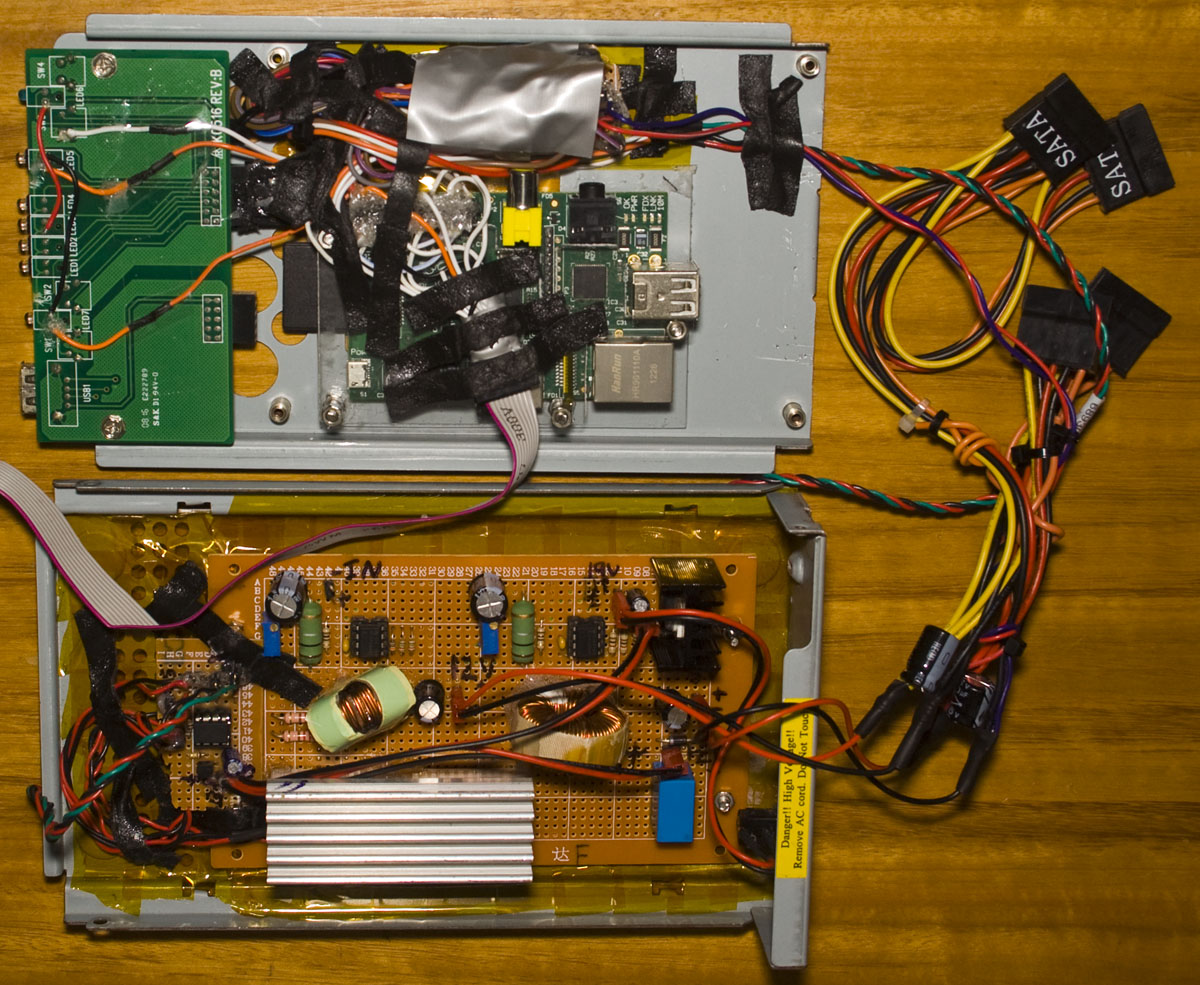
RPi is now mounted along with the shift register board, LEDs board from the NAS and SMPS board connected with SATA power cables.
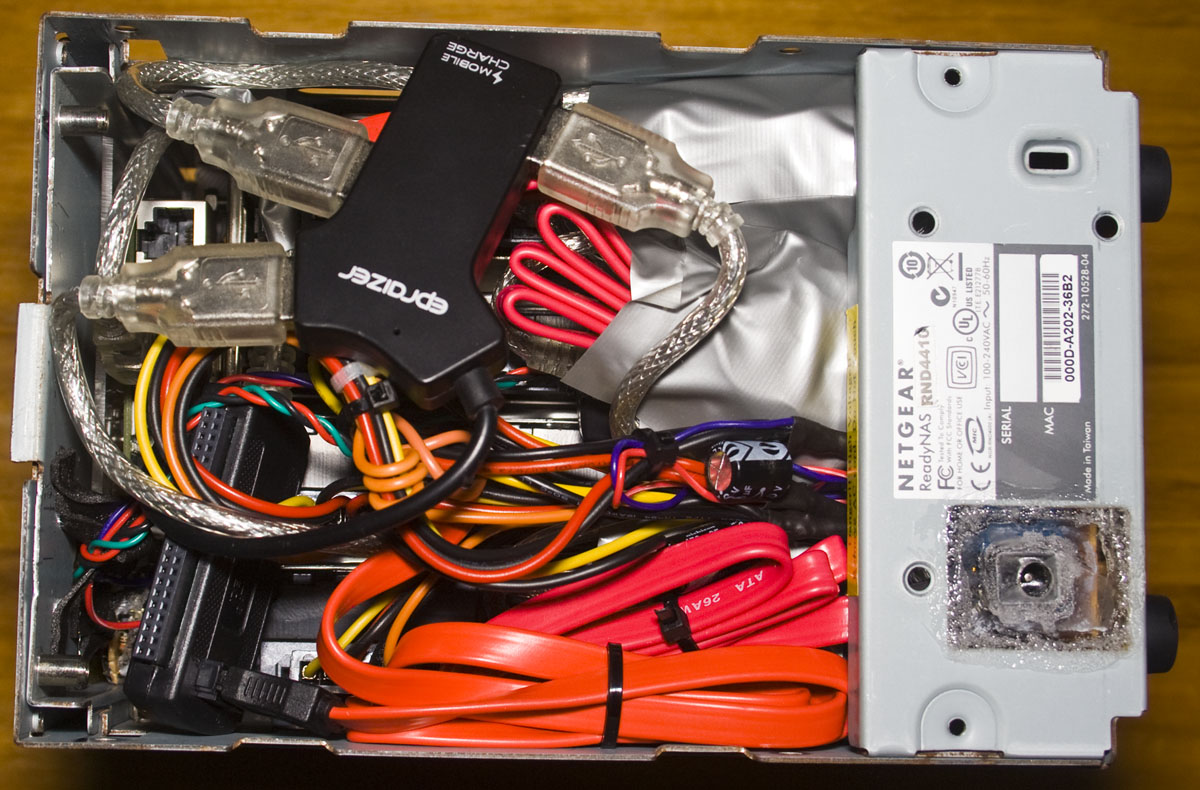
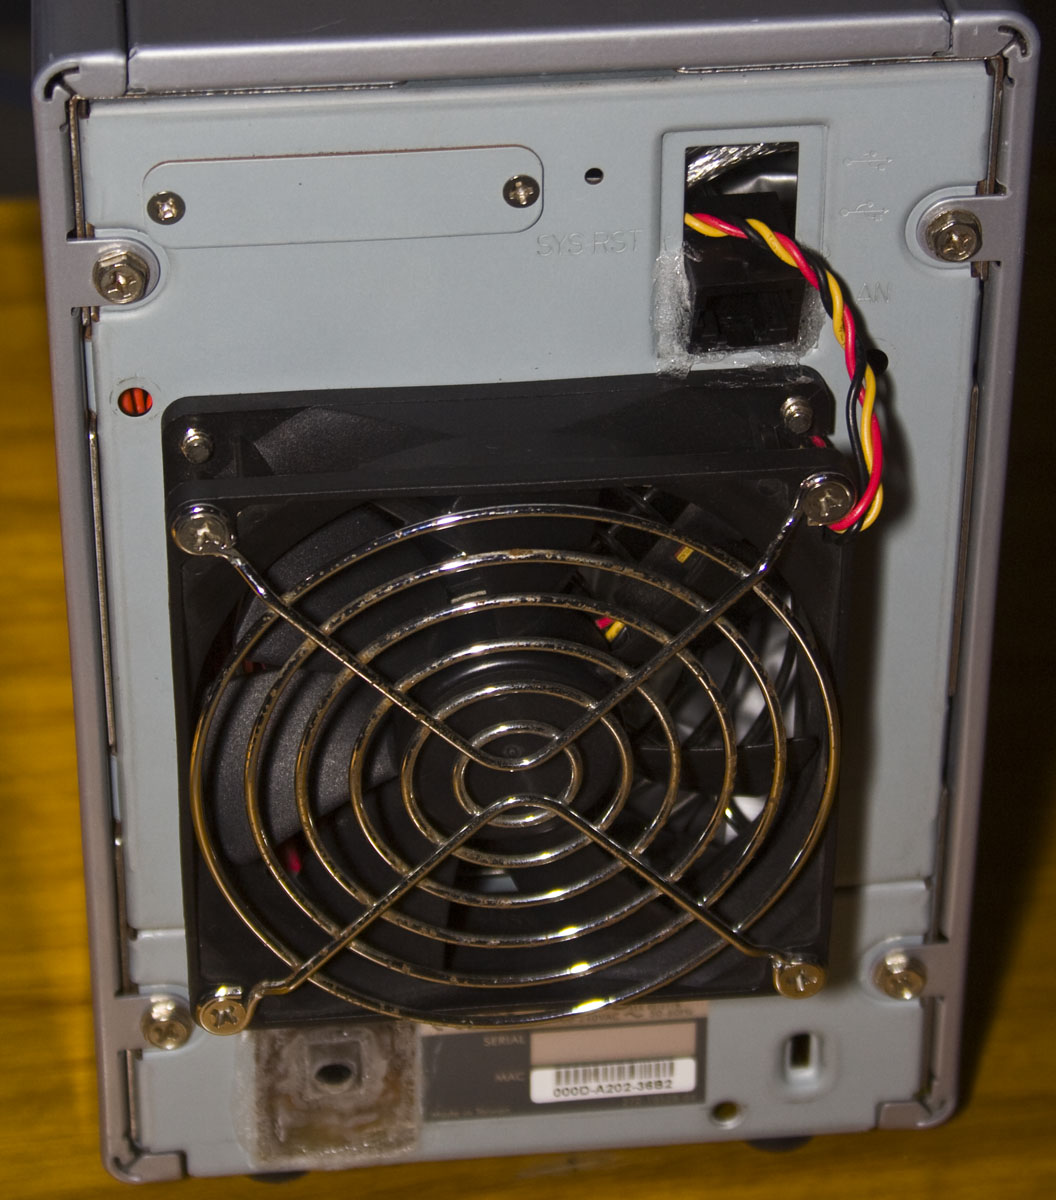
I had to remove the fan that was inside because all the SATA to USB adpaters and USB hubs wouldn’t fit, had to cram it all in there and mount the fan outside, a very tight fit. An issue now is if you had to swap out a hard drive, you’ve have to take the NAS apart. Also I’ve extended the network cable of the RPi just by soldering a cut network cables wires to a spare network socket and glued it on the back above the fan.
As per the first video, it all works! Putting it all together was a bit rough and time consuming but it worked out in the end. Would I mod another of these NAS’s with the RPi? Probably not however what I might look into is making my own case and use 2.5″ laptop drives instead so it’ll be a smaller box but probably not for the near future.


How is the disk performance using a USB HUB?
Not too great, about 4-5 MB/s
Yea that sucks, buy Wandboard or better a Banana Pi M1 (first version) which has a native SATA connector as well as 1Gbit Ethernet connector. The Banana pi only cost $35.
Be-ware the Banana M2 & M3 doesn’t have native SATA connector. But the Banana Pi Pro does again. The pro is just a bit more expensive vs the M1.
btw I like the Raspberry Pi, but the rasp is just lacking some features for using it as a NAS.
You could look to Banana PI, a raspberry clone with sata port
Yes I’ve been looking at the Banana Pi, seems like it would be much faster with the SATA port built in with a 1Gbit LAN. Would be good to know how quick it really is.
I’ve probably all the stuff to build it following your guide, I’ll start from here and eventually switch to Banana Pi or similar solution…
I would like to build a hot-swappable, 2 bay, 2.5″ drive, (and of course wifi! ) nas but the main problem here is that other boards with 1 port sata like UDOO, Banana PI or Cubieboard can’t support PMP (port multiplier) on sata multipliers boards…so in the end we are still limited to 1 drive 🙁
Actually the Banana Pi can support a port multiplier, you just have to recompile the kernel to support it http://forum.lemaker.org/thread-9207-1-1-.html